By importing files and emails to your Timeline, you can auto-generate the events in no time.
1. Import documents
To import documents, click the "Import emails or files" button in the Content Menu on the left side of your screen (it's the button that looks like physical inboxes). A window will appear in the lower right corner of your screen. Click "File" to select the file importer. You now have two options: you can drag and drop supported files into the grey area, or double click the area to import files via your operating system. Then click "Upload".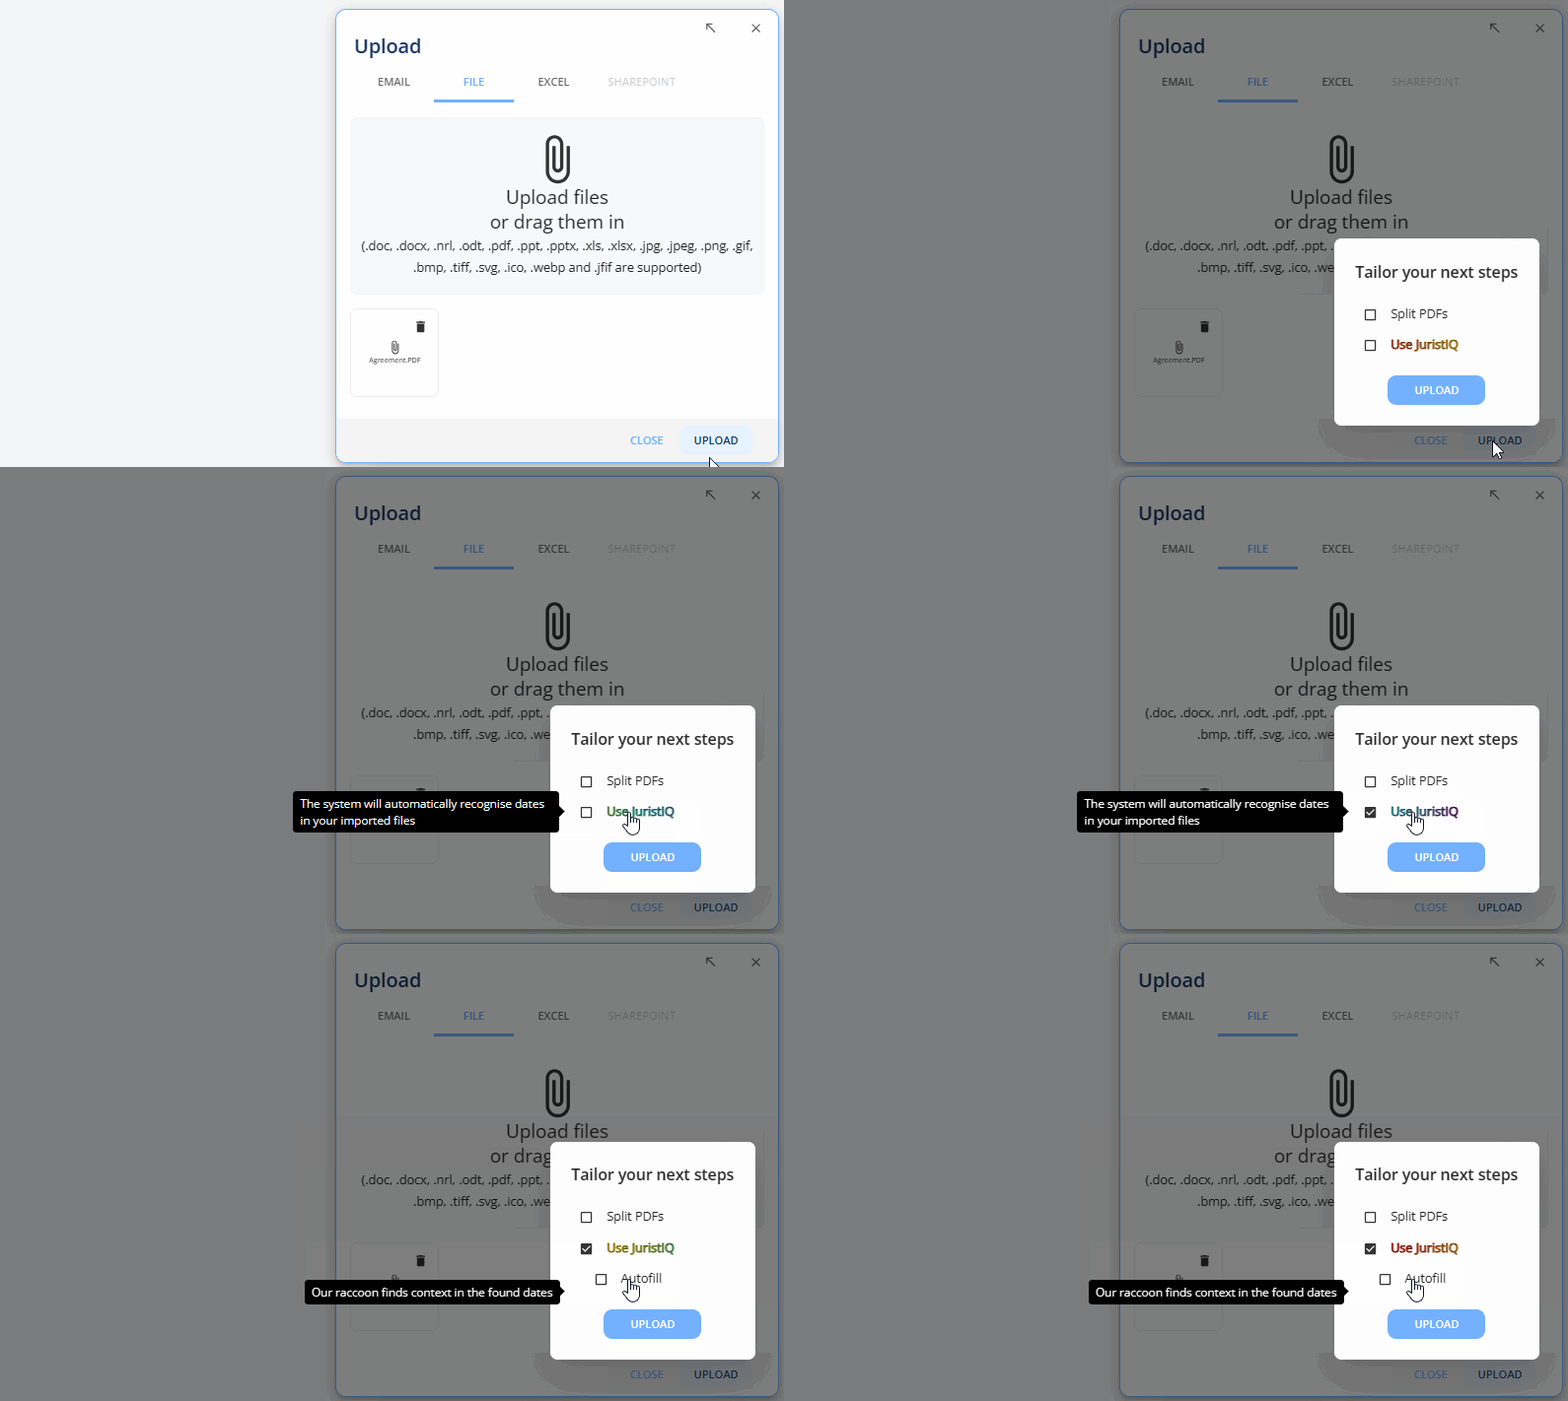
You will then have two options to choose from: splitting PDFs (go to step 2) or to use our AI engine, JuristIQ, to find dates in uploaded documents (go to step 3) or generate descriptions for the timeline (go to step 4).
If you organisation has integrated Juristic with your document or case management system, you can find another button furthest to the right with the name of your integration, e.g. "Sharepoint" for Sharepoint based DMS solutions. Click this to import documents directly from your existing systems.
2. Split long PDFs into multiple documents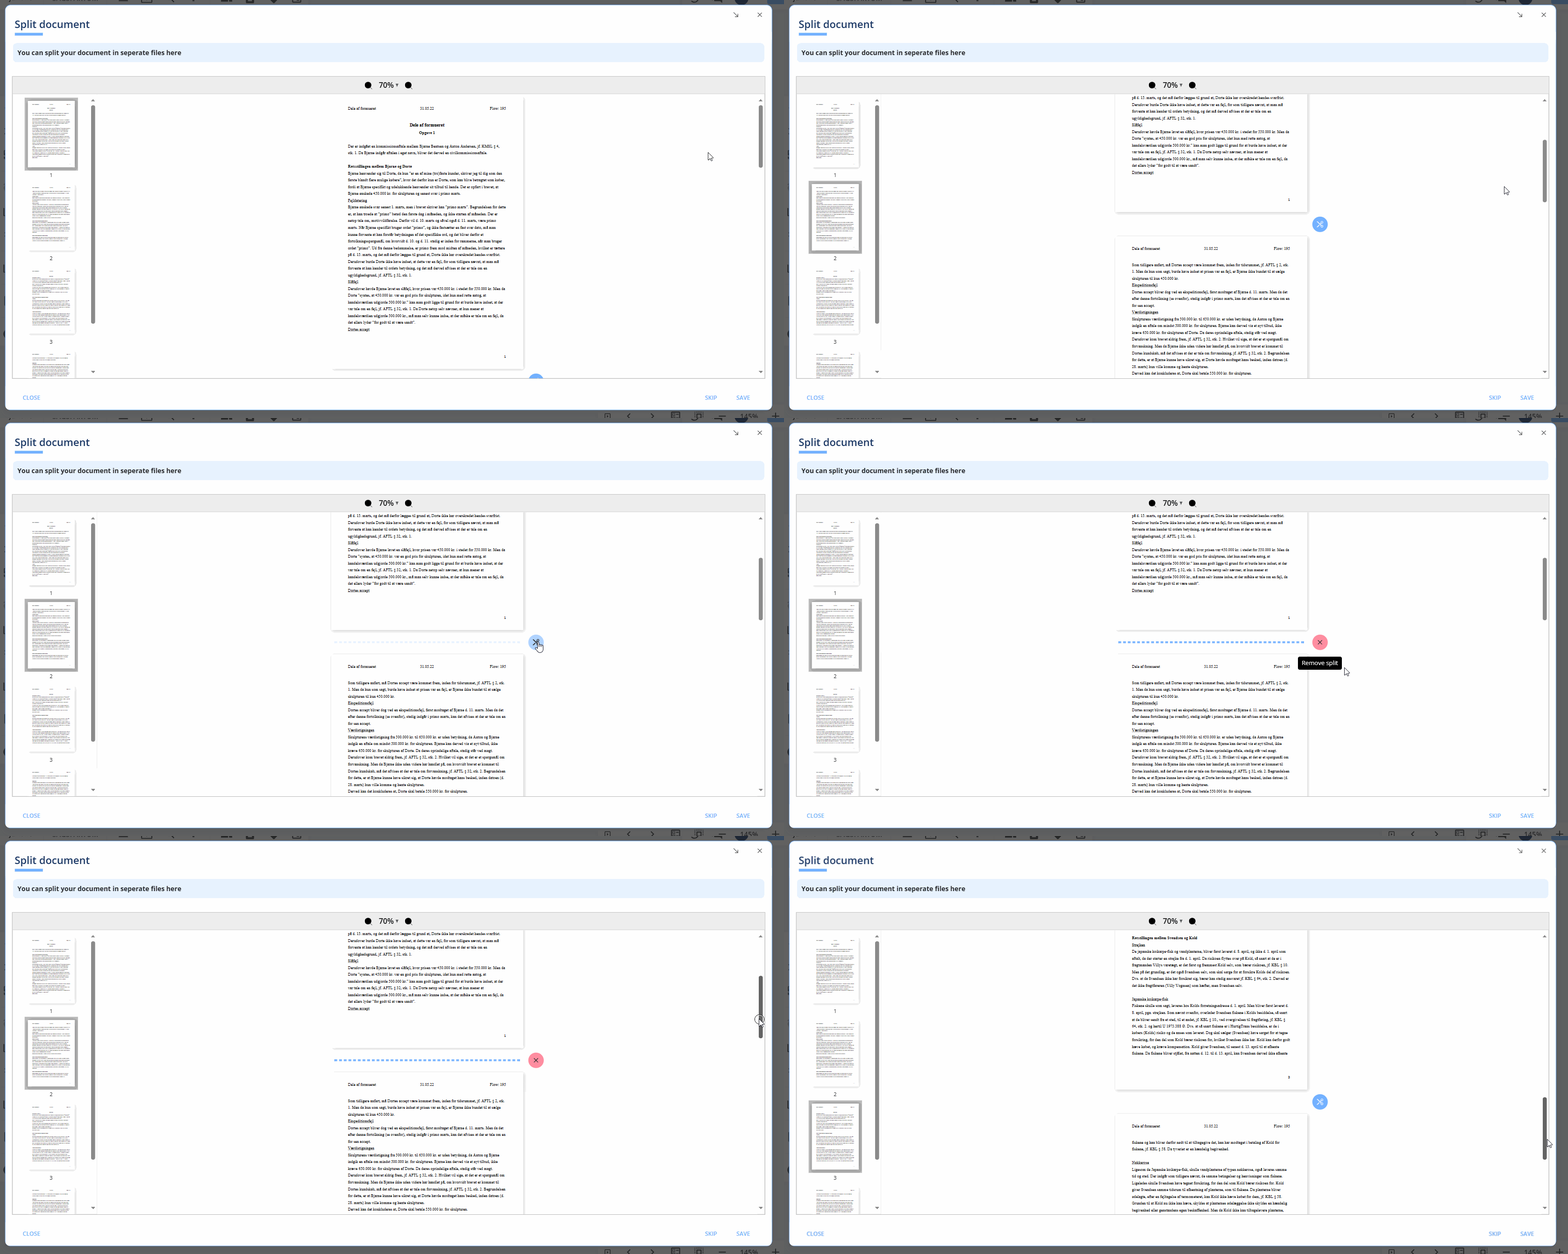
When you have selected "Split PDFs" in the upload options (see above), a new window will open that will guide you through each document. This will allow you to "cut" each document into multiple documents, for example scans of multiple documents in one single file. To make a cut, simply click the scissor icon - and to remove a cut, click the red "x".
If you upload more than one document, the next document will show up automatically when you click "Save".
If you are uploading multiple documents and one document doesn't need to be split, click "Skip". The system will automatically move to the next document.
3. Finding dates in documents and create individual events for each date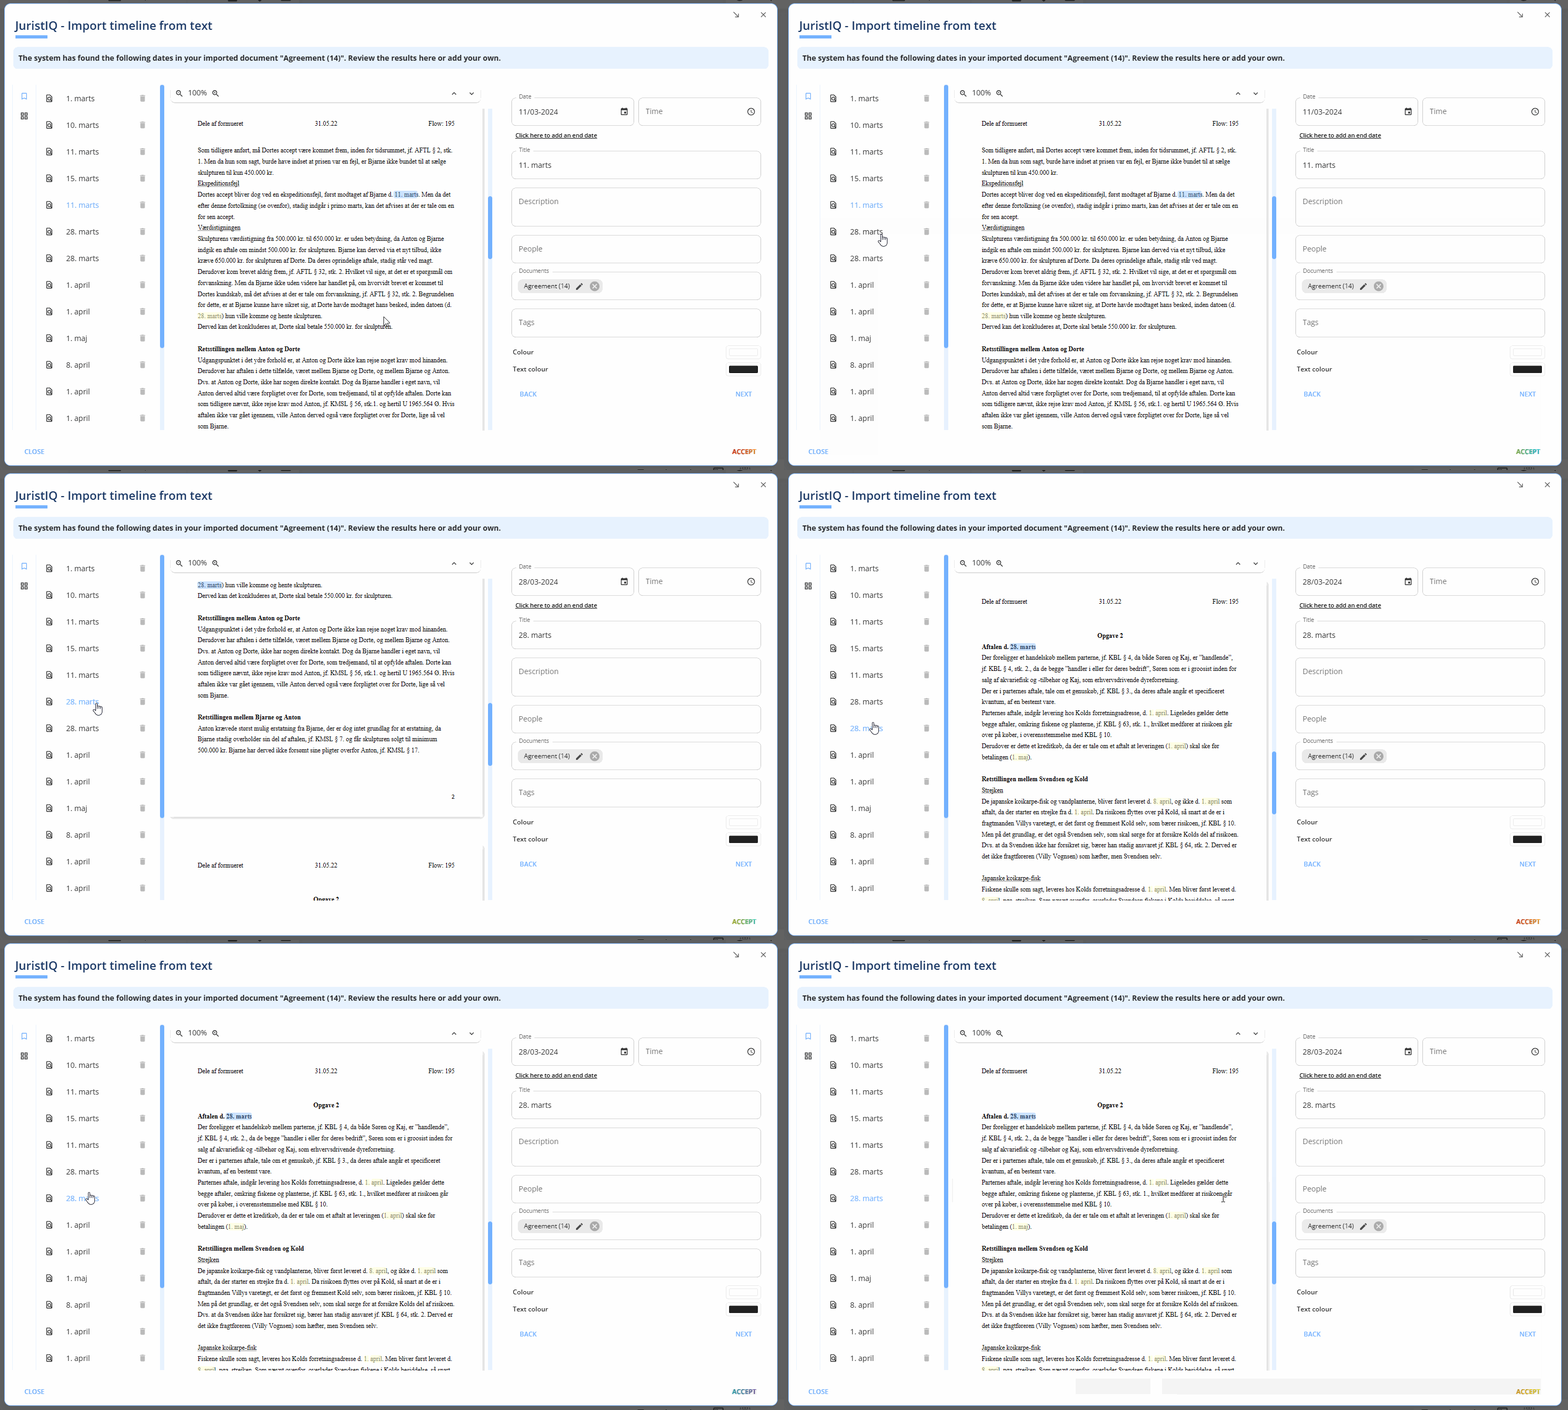
If you enable JuristIQ on upload of your PDF files, the system will automatically look for dates. If the system found one or more dates, it will highlight these in the document and add events in the timeline for each found date. These events will be listed in the left overview. You can then go through each found date and add more details, e.g. a new title, descriptions, people, documents, and tags. When you are done, click "Accept" and all events will be generated in the timeline.
If you want to manually add a date, simply select the text in the document window and click the "+" icon. This will add another event to the list.
To remove a found date, simply click the trash bin icon in the left overview of the dates.
4. Generate descriptions and content based on the uploaded documents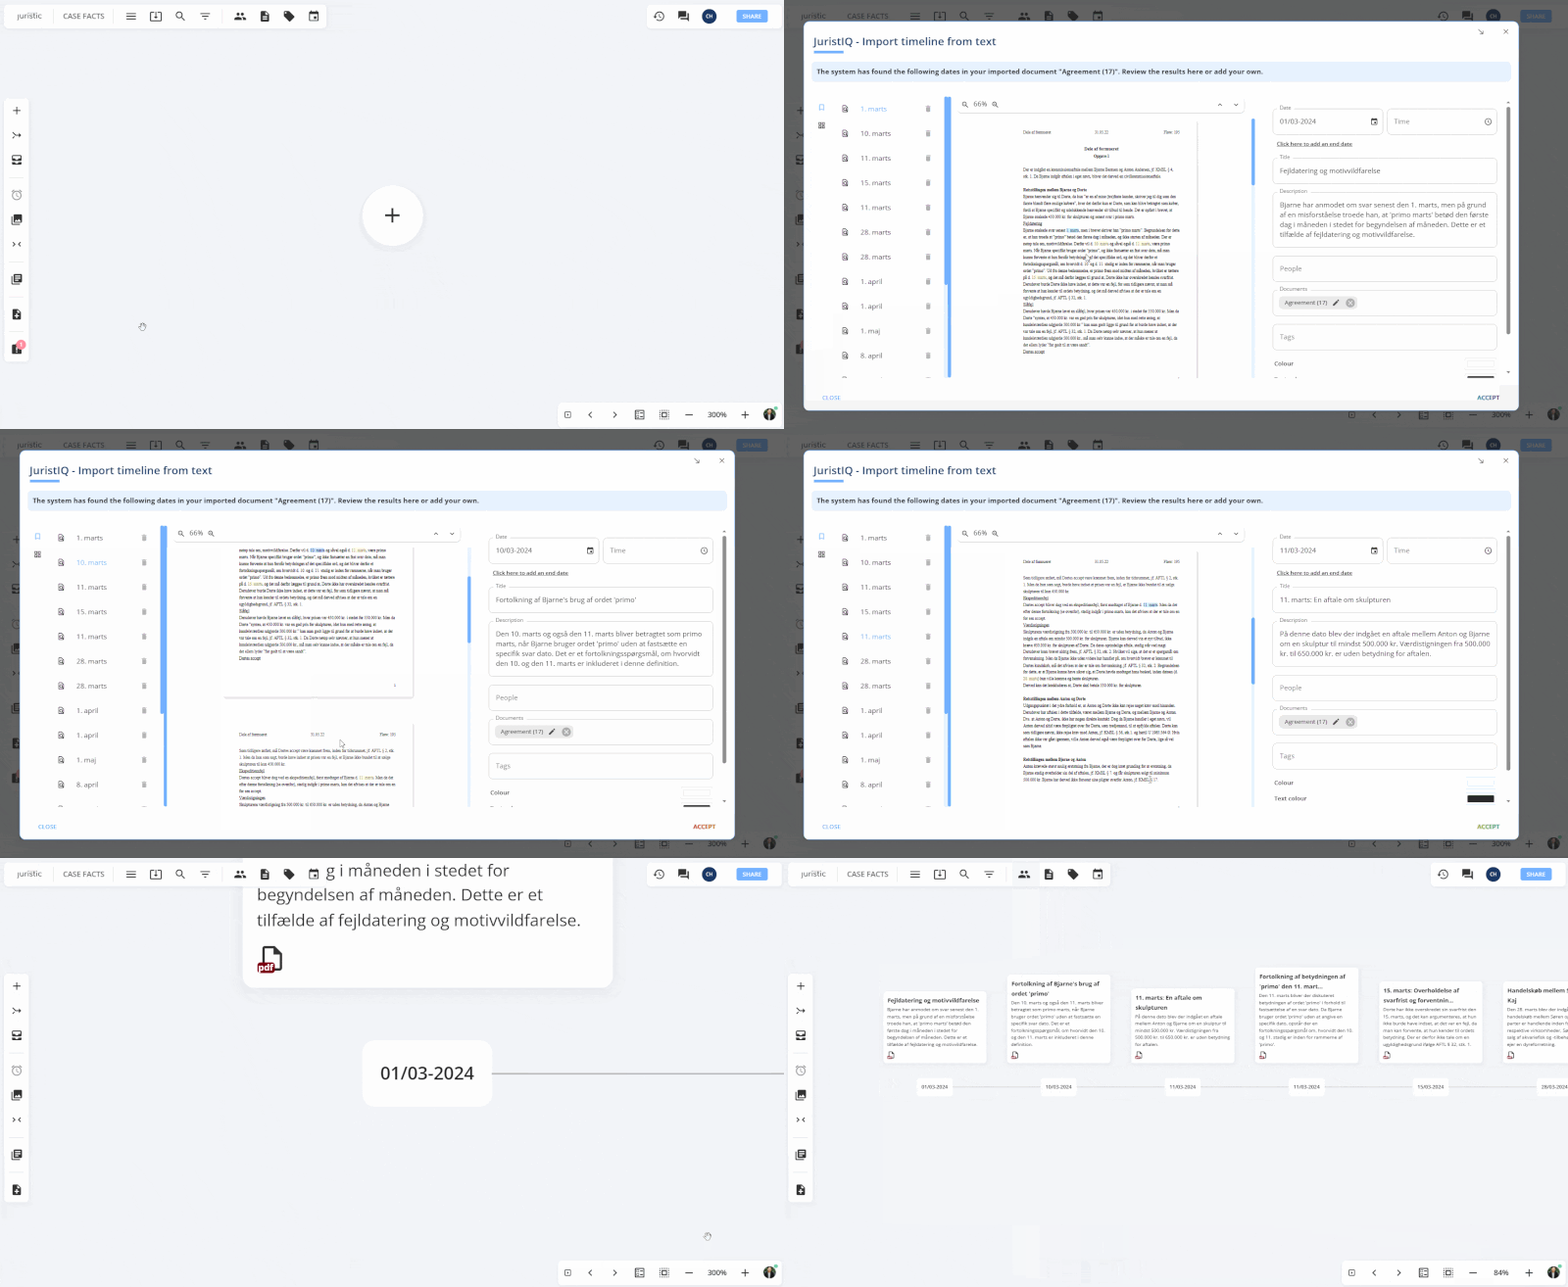
If you enable JuristIQ on upload of your PDF files and add the option to "Autofill" (see the animated illustration above), Juristic will automatically look for dates and (if any are found) use AI to add descriptions based on the context surrounding this information.
You can connect your organisation's AI model, for example if you have your own OpenAI or Microsoft environments - this means that you will have full control of your data
The use of this feature needs to be enabled to ensure compliance with your organisation's policies. Reach out to us if you are interested.
5. Import emails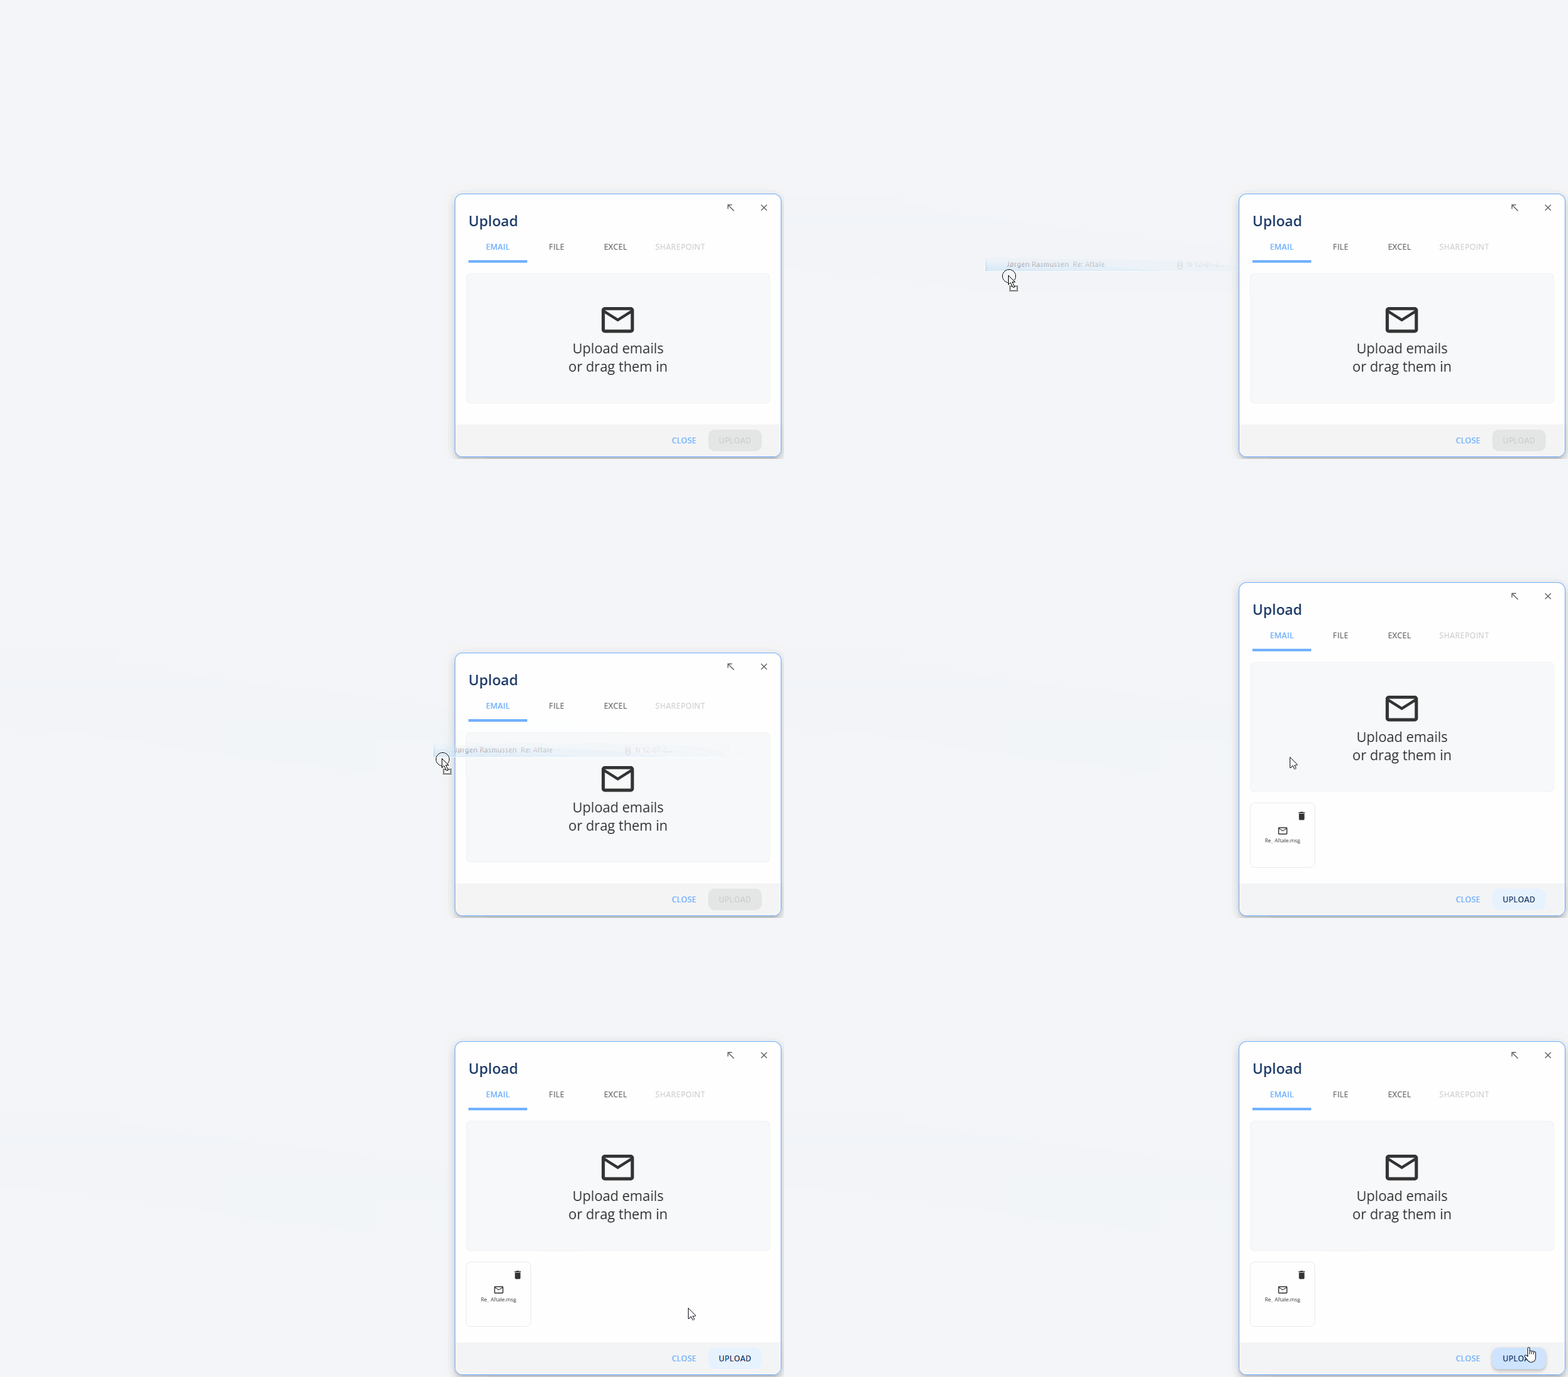
To upload emails or email threads to Juristic, click the "Import emails or files" button in the Content Menuon the left side of your screen (it's the button that looks like physical inboxes). A window will appear in the lower right corner of your screen. Click "Email" and then simply drag and drop them from your Outlook inbox - or from a folder on your computer. Then click "Upload".
If there are more emails in a thread, a new window may appear. Here you can split email threads into individual emails on the timeline. Please refer to the next step.
Email attachments will be available in the timeline as well.
6. Split email threads into individual events for each email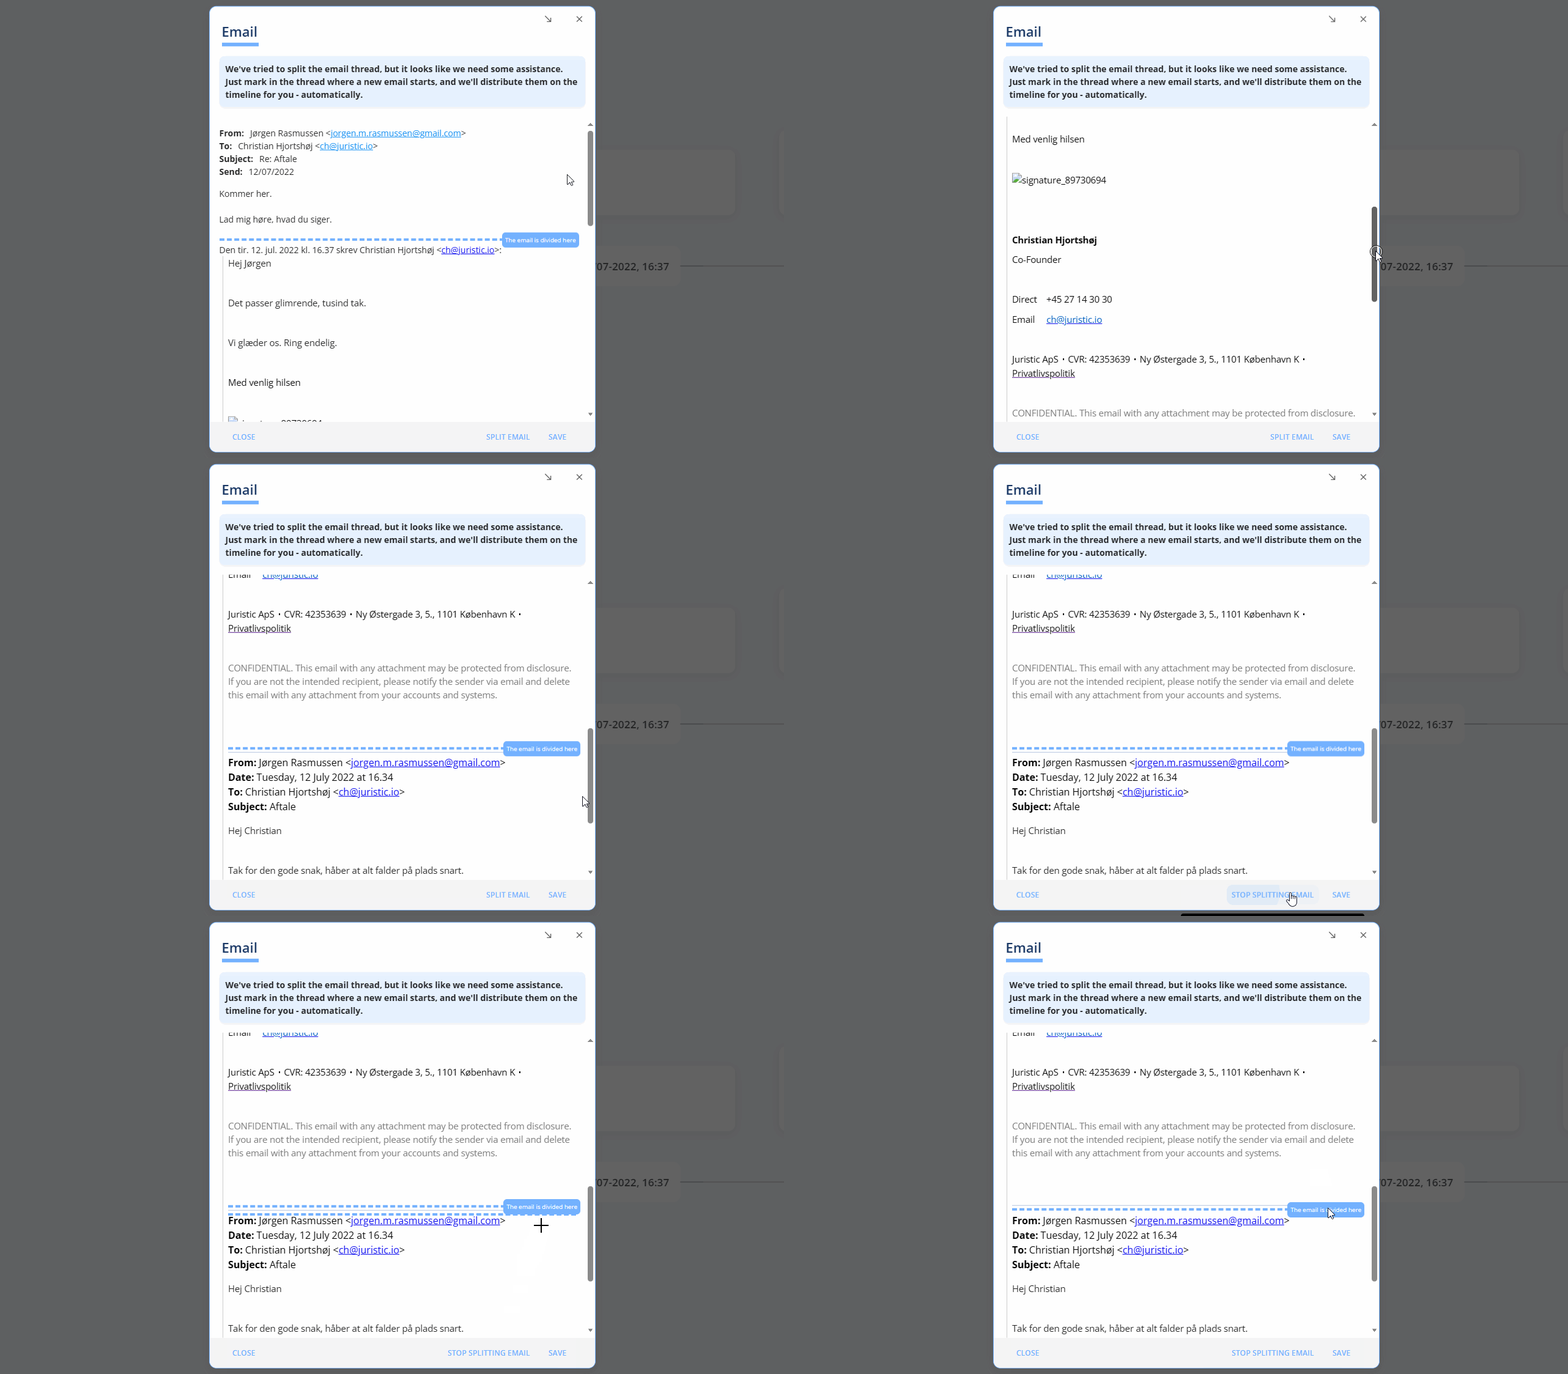
The system will attempt to split the email thread itself; you can check the result in the window. The blue lines define where the thread will be split. If you need to perform changes, click the button "Split email". This will give you 2 options:
To add new splits, simply point your mouse cursor on the position where you want the split and left click. A new line should be added.
To remove an existing split, simply click on the blue line or the "The email is divided here" attached to the blue line that you want to remove.